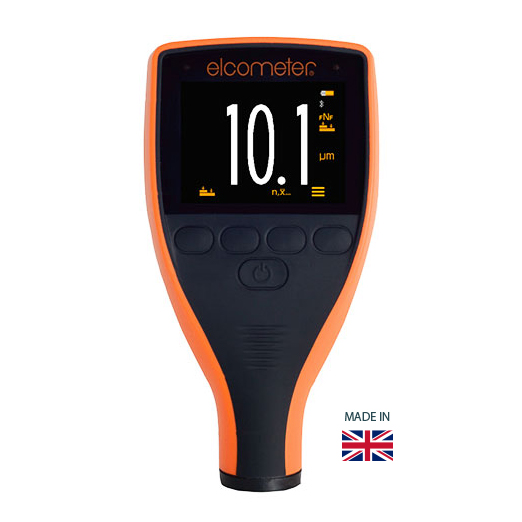
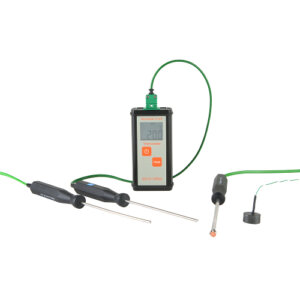
Elcometer 415 paint thickness gauge provides a simple, accurate, and reliable way to measure coatings on all smooth ferrous and non-ferrous metal surfaces
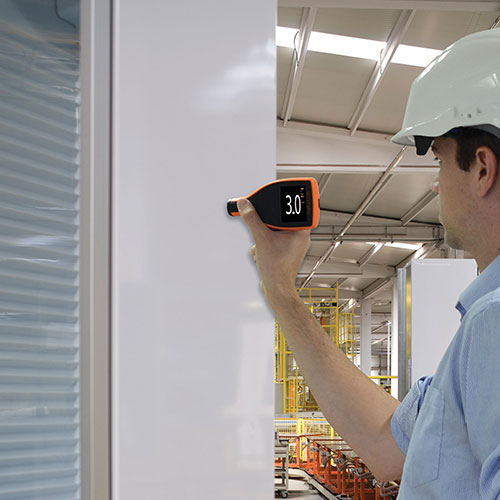
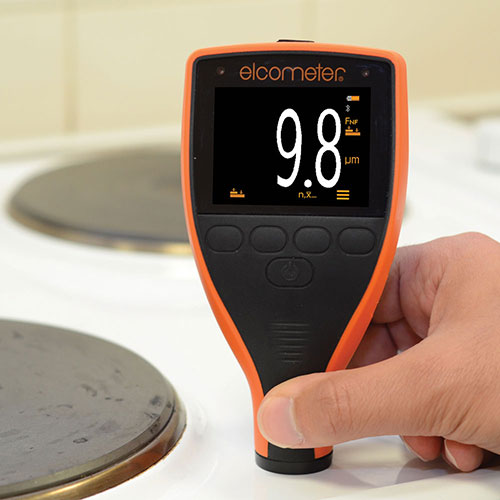
The Elcometer 415 paint thickness gauge auto-switches to read on either ferrous or non-ferrous substrates. This is ideal for measuring paint or powder on both steel and aluminum surfaces such as car body panels or in a powder shop.
ELCOMETER 311 MODEL SPECIFICATIONS
Model B – Ferrous
Minimum Substrate Thickness: Steel: 300μm (12mils) , Aluminium: 100μm (4mils) – FNF gauges only
Model B Dual FNF Paint & Powder Coating
Minimum Substrate Thickness: Steel: 300μm (12mils) , Aluminium: 100μm (4mils) – FNF gauges only
Model T Ferrous
Minimum Substrate Thickness: Steel: 300μm (12mils) , Aluminium: 100μm (4mils) – FNF gauges only
Model T Dual FNF Paint & Powder
Minimum Substrate Thickness: Steel: 300μm (12mils) , Aluminium: 100μm (4mils) – FNF gauges only
SELECT YOUR MODEL ON TOP OF THE PAGE TO VIEW THE PRICE

Elcometer 415 is used for:
- industrial paint & powder coating thickness
- flat or curved surfaces
- smooth & thin substrates
- automatically switching between ferrous & non-ferrous substrates
SLASH THE COST OF ELCOMETER 415
BY GETTING OUR PAINTING BOOTH KIT or POWDER COATING INSPECTION KIT
| SEE OTHER KITS AVAILABLE
What makes Elcometer 415 so efficient?
- Zero or smooth (2 points) calibration ensures accuracy on smooth & thin coated substrates
- Easy to use, ergonomic design provides maximum comfort for continuous use
- Incredibly fast (60+ readings per minute), reducing inspection times, increasing productivity
- Measures cured paint & powder coatings up to 1000µm (40mils)
- Auto-rotating, large, color display provides high visibility whatever the angle of measurement
- Scratch, solvent & water-resistant display protects against the elements
- Rugged & resistant to dust or powder coatings equivalent to IP64, ideal for modern industrial & powder coating environments
- Switches instantly between ferrous & non-ferrous substrates without interruption1
Specifications
| Model B | Model T | Model T | |
| Part Number | A415CFBI | A415CFTI | A415CFNFTI |
| Calibration Test Certificate | • | • | • |
| Built-in Probe Type | Steel (F) |
Steel (F) |
Steel & Aluminium (FNF) |
| Fast accurate reading rate; 60+ readings per minute |
■ | ■ | ■ |
| On-screen statistics Number of readings, n; Average (mean), x; Lowest reading, Lo Highest reading, Hi |
■ | ■ | ■ |
| Live data output | USB | Bluetooth® & USB |
Bluetooth® & USB |
| Measurement Range | 0-1000µm / 0-40mils | ||
| Accuracy (whichever is greater) | ±1-3% or ±2.5μm (±0.1mil) | ±1-3% or ±2.5μm (±0.1mil) | ±1-3% or ±2.5μm (±0.1mil) |
| Resolution | 0.01mil: 0-5mils; 0.1mil: 5-40mils | 0.01mil: 0-5mils; 0.1mil: 5-40mils | 0.01mil: 0-5mils; 0.1mil: 5-40mils |
| Operating Temperature | -10 to 50°C / 14 to 122°F | ||
| Relative Humidity (RH) | 0 to 95% | ||
| Power Supply | 2 x AA Batteries or via USB (rechargeable batteries can also be used) |
||
| Gauge Dimensions (h x w x d) | 0 to 95% | ||
| Gauge Weight (including batteries) | 156g / 5.5oz | ||
| Standards | AS2331.1.4, AS/NZS 1580.108.1, ASTM B 499, ASTM D 1186, ASTM D 1400, ASTM D 7091, ASTM E 376, BS 3900-C5-6A, BS 3900-C5-6B, BS 5411-11, BS 5411-3, BS 5599, DIN 50981, DIN 50984, ECCA T1, EN 13523-1, ISO 2360, ISO 2808-12, ISO 2808-6A, ISO 2808-6B, ISO 2808-7C, ISO 2808-7D, JIS K 5600-1-7, NF T30-124 |
||
SAVE BIG by purchasing our powder inspection kit
QUICK TIP:
How to use Elcometer 415 Powder & Paint Gauge to obtain a reading:
The gauge should be calibrated before taking readings, see Section 7 ‘Calibrating the Gauge’ on page 6. To take a reading:
1 Whilst holding the gauge perpendicular, gently place the probe onto the surface.
2 The reading may be inaccurate if the probe is not held flat against the surface.
3 The coating thickness is shown on the display. 4 ‘>1000µm’ (‘>40mils’) indicates a reading outside the gauge range.
4 For subsequent readings, lift the probe off and then replace it on to the coated surface. ® Using ElcoMaster the Elcometer 415 can simultaneously transmit the live reading to a PC or mobile device (Model T only) for report generation, see Section 8 ‘Downloading Data’ on page 8 for more information.
The Elcometer 415 calculates and displays statistical values as each reading is taken, see Section 6 ‘Statistics’ for details.
Elcometer 415 paint thickness gauge provides a simple, accurate, and reliable way to measure coatings on all smooth ferrous and non-ferrous metal surfaces
The Elcometer 415 paint thickness gauge auto-switches to read on either ferrous or non-ferrous substrates. This is ideal for measuring paint or powder on both steel and aluminum surfaces such as car body panels or in a powder shop.
ELCOMETER 311 MODEL SPECIFICATIONS
Model B – Ferrous
Minimum Substrate Thickness: Steel: 300μm (12mils) , Aluminium: 100μm (4mils) – FNF gauges only
Model B Dual FNF Paint & Powder Coating
Minimum Substrate Thickness: Steel: 300μm (12mils) , Aluminium: 100μm (4mils) – FNF gauges only
Model T Ferrous
Minimum Substrate Thickness: Steel: 300μm (12mils) , Aluminium: 100μm (4mils) – FNF gauges only
Model T Dual FNF Paint & Powder
Minimum Substrate Thickness: Steel: 300μm (12mils) , Aluminium: 100μm (4mils) – FNF gauges only
SELECT YOUR MODEL ON TOP OF THE PAGE TO VIEW THE PRICE

Elcometer 415 is used for:
- industrial paint & powder coating thickness
- flat or curved surfaces
- smooth & thin substrates
- automatically switching between ferrous & non-ferrous substrates
SLASH THE COST OF ELCOMETER 415
BY GETTING OUR PAINTING BOOTH KIT or POWDER COATING INSPECTION KIT
| SEE OTHER KITS AVAILABLE
What makes Elcometer 415 so efficient?
- Zero or smooth (2 points) calibration ensures accuracy on smooth & thin coated substrates
- Easy to use, ergonomic design provides maximum comfort for continuous use
- Incredibly fast (60+ readings per minute), reducing inspection times, increasing productivity
- Measures cured paint & powder coatings up to 1000µm (40mils)
- Auto-rotating, large, color display provides high visibility whatever the angle of measurement
- Scratch, solvent & water-resistant display protects against the elements
- Rugged & resistant to dust or powder coatings equivalent to IP64, ideal for modern industrial & powder coating environments
- Switches instantly between ferrous & non-ferrous substrates without interruption1
Specifications
| Model B | Model T | Model T | |
| Part Number | A415CFBI | A415CFTI | A415CFNFTI |
| Calibration Test Certificate | • | • | • |
| Built-in Probe Type | Steel (F) |
Steel (F) |
Steel & Aluminium (FNF) |
| Fast accurate reading rate; 60+ readings per minute |
■ | ■ | ■ |
| On-screen statistics Number of readings, n; Average (mean), x; Lowest reading, Lo Highest reading, Hi |
■ | ■ | ■ |
| Live data output | USB | Bluetooth® & USB |
Bluetooth® & USB |
| Measurement Range | 0-1000µm / 0-40mils | ||
| Accuracy (whichever is greater) | ±1-3% or ±2.5μm (±0.1mil) | ±1-3% or ±2.5μm (±0.1mil) | ±1-3% or ±2.5μm (±0.1mil) |
| Resolution | 0.01mil: 0-5mils; 0.1mil: 5-40mils | 0.01mil: 0-5mils; 0.1mil: 5-40mils | 0.01mil: 0-5mils; 0.1mil: 5-40mils |
| Operating Temperature | -10 to 50°C / 14 to 122°F | ||
| Relative Humidity (RH) | 0 to 95% | ||
| Power Supply | 2 x AA Batteries or via USB (rechargeable batteries can also be used) |
||
| Gauge Dimensions (h x w x d) | 0 to 95% | ||
| Gauge Weight (including batteries) | 156g / 5.5oz | ||
| Standards | AS2331.1.4, AS/NZS 1580.108.1, ASTM B 499, ASTM D 1186, ASTM D 1400, ASTM D 7091, ASTM E 376, BS 3900-C5-6A, BS 3900-C5-6B, BS 5411-11, BS 5411-3, BS 5599, DIN 50981, DIN 50984, ECCA T1, EN 13523-1, ISO 2360, ISO 2808-12, ISO 2808-6A, ISO 2808-6B, ISO 2808-7C, ISO 2808-7D, JIS K 5600-1-7, NF T30-124 |
||
SAVE BIG by purchasing our powder inspection kit
QUICK TIP:
How to use Elcometer 415 Powder & Paint Gauge to obtain a reading:
The gauge should be calibrated before taking readings, see Section 7 ‘Calibrating the Gauge’ on page 6. To take a reading:
1 Whilst holding the gauge perpendicular, gently place the probe onto the surface.
2 The reading may be inaccurate if the probe is not held flat against the surface.
3 The coating thickness is shown on the display. 4 ‘>1000µm’ (‘>40mils’) indicates a reading outside the gauge range.
4 For subsequent readings, lift the probe off and then replace it on to the coated surface. ® Using ElcoMaster the Elcometer 415 can simultaneously transmit the live reading to a PC or mobile device (Model T only) for report generation, see Section 8 ‘Downloading Data’ on page 8 for more information.
The Elcometer 415 calculates and displays statistical values as each reading is taken, see Section 6 ‘Statistics’ for details.

 0 items
