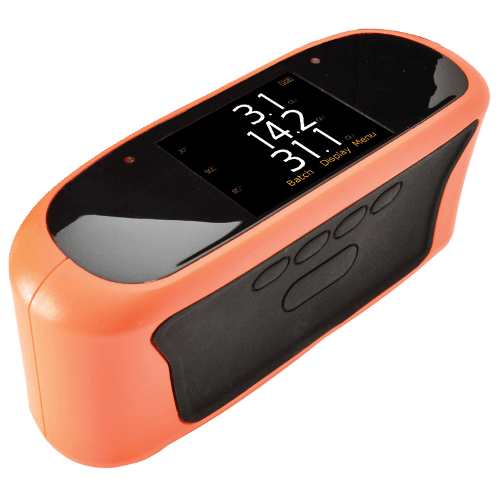
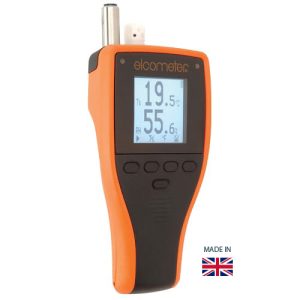
Elcometer 480 gloss meters are designed to outperform the industry standards. Gloss is a key measurement used to define and quantify a product’s overall visual quality.
Ideal for any material, including paint, plastic, ceramic, or metal. Easy to use, with multi-lingual menu structures, exceptional repeatability & accuracy.
Gloss is measured by directing a constant intensity light beam at a fixed angle, and monitoring the amount of reflected light. Different surfaces require different reflective angles. With Elcometer 480 simultaneously measure up to 3 angles at a rate of 10 readings per second. Instantly transfer info to PC, iPhone, AndroidTM, or other mobile devices via USB or Bluetooth®.
ELCOMETER 480 MODEL SPECIFICATIONS
Single-Angle Glossmeter – 60° – Model B
Single angle, entry-level 60 degree glossmeter without memory
Single-Angle Glossmeter – 60° – Model T
Single angle, top model 60-degree glossmeter
Dual-Angle Glossmeter – 20/60° – Model T
Dual angle, top model 20/60 degree glossmeter |
Triple-Angle Glossmeter – 20/60/85° – Model T
Triple angle, top model 20/60/85 degree glossmeter.
Elcometer 480 High Gloss Tile – Nominal 97GU @ 60 degree (certified)
Elcometer 480 Low Gloss Tile – Nominal 22GU @ 60 degree
Elcometer 480 Mid Gloss Tile – Nominal 55GU @ 60 degree
Elcometer 480 Mirror Gloss Tile – Nominal 1900GU @ 20 degree
Using the ElcoMasterTM software, professional reports for glass and other appearance measurements can be quickly generated. Alternatively, gloss readings can be combined with other key measurement parameters such as coating thickness, adhesion and oven temperature profile – within the same software package.
Memory and batching
Store 40,000 date and timed stamped readings in up to 2,500 user definable
alpha-numeric batches.
Readings can be transferred to PC, iPhone, Android™ or other mobile devices
via USB or Bluetooth® for instant reporting using ElcoMaster™ software.
Display Modes
- Scratch and solvent resistant colour LCD allows the user to
display, fully customisable : - Gloss, % Reflectance or Haze readings
- Statistics
- Readings and Differential with pass/fail
- Trend Graph
- Analogue Scan Bar
- Standard, Auto Repeat & Scan Modes
Elcometer 480 is equipped with three measurement modes:
• Standard Mode: Press the measure button to take an individual spot
measurement.
• Auto Repeat Mode: The glossmeter can automatically take between 10 – 180 readings per minute.
When enabled all the individual readings are stored into memory.
• Scan Mode: The gauge measures all three angles at a continuous rate of 10 readings
per second. When stopped, the gauge displays and stores the average,
highest and lowest values – ideal for checking a sample’s overall
uniformity.
This instrument complies with:
AS/NZS 1580.602.2, ASTM C584, ASTM C523, ASTM D523, ASTM D1455, ASTM D2457, ASTM D4039, ASTM D4449, ASTM D5767, ASTM E430, ASTM E2387, BS 3900 D5, DIN 67530, ECCA T2, EN 12373-11, EN 13523-2, ISO 7668, ISO 2813, ISO 13803, ISO 17025, JIS K 5600-4-7, JIS Z 8741, TAPPI T 653 (20°)
| Product Features – Elcometer 480 | Standard • |
Optional • |
| Model B | Model T | |
| Measurement geometries | 60° | 60°, 20/60° or 20/60/85°* |
| Measurement units | GU | GU, HU† & % |
| Fast, accurate reading rate | • | • |
| Repeatable & reproducible measurements | • | • |
| Easy to use menu structure; in 30+ languages | • | • |
| Tough, impact, waterproof & dust resistant | • | • |
| Scratch & solvent resistant colour display; 2.4″ (6cm) TFT | • | • |
| Rotating display: auto, 0°, 180° | • | • |
| Ambient light sensor; with adjustable auto brightness | • | • |
| Data output | ||
| USB live readings | • | • |
| USB batch download | • | |
| Bluetooth®: to PC, iOS or Android™ mobile devices | • | |
| USB & battery powered | • | • |
| Calibration Certificate | • | • |
| Manual gauge calibration | • | • |
| Auto gauge calibration; via RFID tagging of integrated calibration tile# | • | |
| On screen statistics – user selectable | ||
| Number of readings, Mean (average), Standard deviation | • | • |
| Highest reading, Lowest reading, Range | • | |
| Coefficient of variation | • | |
| Nominal value, High Limit value, Low Limit value | • | |
| Number above high limit, Number below low limit | • | |
| Measurement modes | ||
| Standard Mode | • | • |
| Auto Repeat Mode; programmable 10-180 readings per minute | • | |
| Scan Mode; 10 readings per second | • | |
| Differential Mode with Pass/ Fail mode; | • | |
| Limit Standards; up to 40 programmable standards | • | |
| Gauge & batch specific standard limits | • | |
| Gauge memory 40,000 readings in up to 2,500 batches | • | |
| Alpha-numeric batch names | • | |
| Fixed batch size mode | • | |
| Date and time stamp | • | |
| Gauge auto diagnostics | • | • |
| Display modes; user selectable | ||
| Readings; gloss, % reflectance†, haze† | • | • |
| Selected statistics | • | • |
| Live trend graph; last 20 readings | • | |
| Scan bar | • | |
| Readings & differential (with pass/fail) | • | |
| Delete last reading | • | • |
| 2 year extended warranty | • | • |
| * Dependant on model | † Haze on Dual and Triple models only | |
| # Radio Frequency Identification; patent applied for | ||
QUICK TIP:
Taking a reading: standard mode (b & t):
1. Press and hold the measure softkey for approximately 3 seconds to switch the gauge on.
2. Perform the calibration procedure if required – see Section 5 ‘Calibration’ on page 13. d
3. Place the gauge on the test surface and press the measure softkey to take a reading. A reading is displayed on the screen (for each geometry selected via Display/Display Geometry – see Section 3.6 ‘Geometry Selection’ on page8).
4 If the user has chosen to view ‘Selected Statistics’, ‘Run Chart’ or ‘Bar Graph’ – see Section 3.5 ‘Setting Up the Reading Display’ on page 6.
Pressing the softkey displays the statistics, run chart, or bar graph for each 8 individual geometry.
Download Data Sheet
Download Instruction Manual

 0 items


